Great article on how to do the MZR/Duratec 2.5l NC swap
The following is a post from Moto-Mike @ forum.miata.net on how to swap a 2.5 MZR/Duratec into an NC. I'm reposting it in case miata.net goes up in flames.
2.5 swap instructions
As many know we are replacing the 2.0 with the 2.5, so here's some of the info documented so that folks can get an idea as to what to expect. Some of this is from what we've done here, some are portions from various combinations we've tuned that others put in:
- 2.5 long black should be obtained from a 2009+ Mazda 3, 6, Ford Fusion, Mercury Milan, or nearly ANY 4 cylinder duratec 2009+ that is a 2.5. Same goes for Mazda MZR 2.5's post 2009.
- HP: Where a stock NC might dyno 140whp, expect 170 NA on the 2.5 w/bolt-ons, 180 with street cams, 200 with race cams 220 with an intake/ITBs, 240 with high compression pistons and all of the above. Note that because the torque is higher and the curve is more broad, a 2.5 170hp will feel much stronger below 6k than the 2.0 at the same HP.
What is different:
- Motor mounts are direct bolt-ons, trans bolts up the same, exhaust manifold is the same.
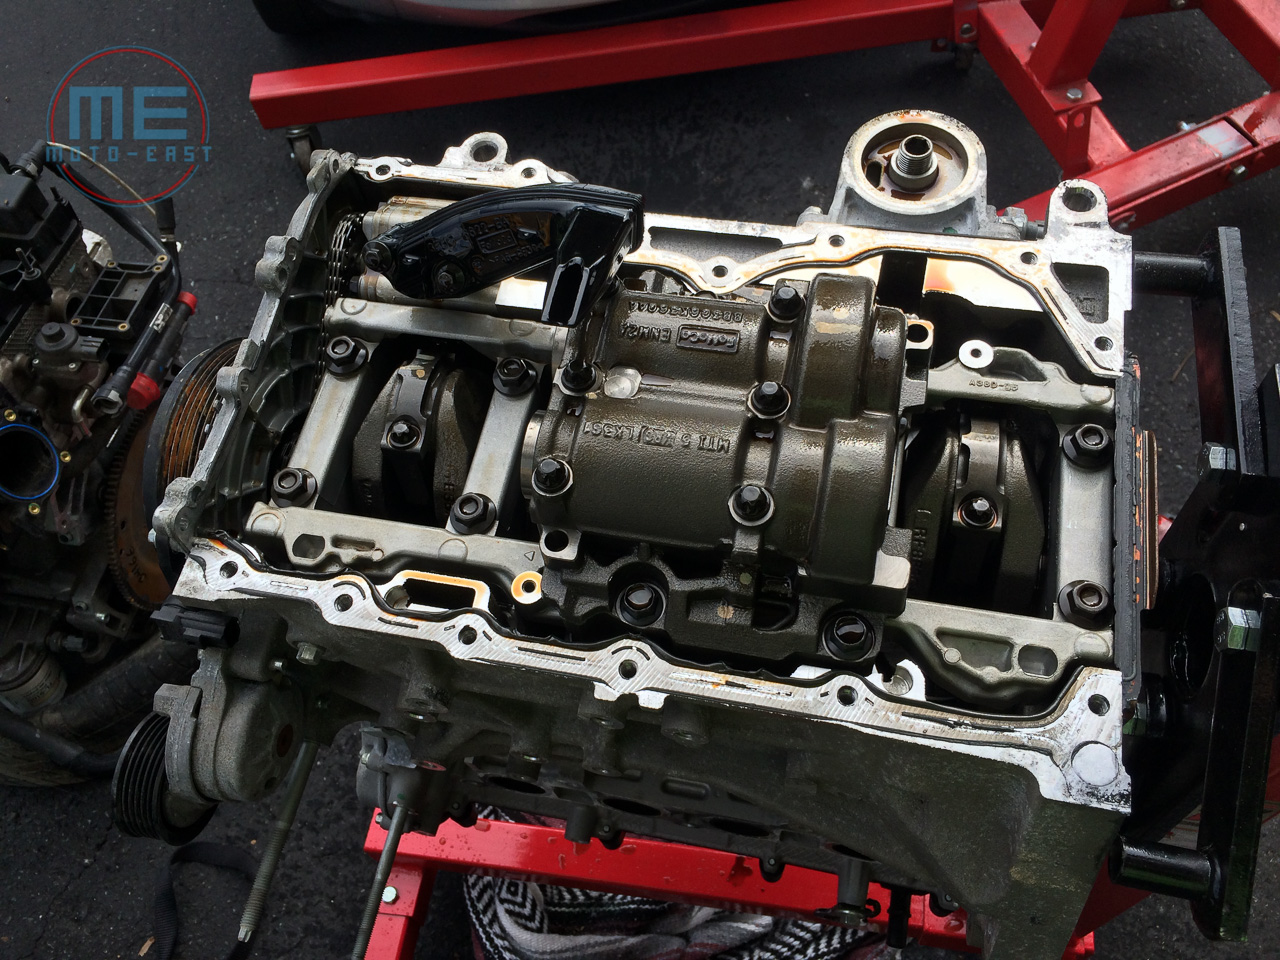
- The oil pickup and oil pan. You will need to use your 2.0 pickup, and the 2.0 pan. Also make sure to remove the balance shafts. We used the massive balance shaft delete kit, though the best way is to tap the hole for pipe thread and use red loctite. Do not weld it shut as it is cast and may crack eventually.
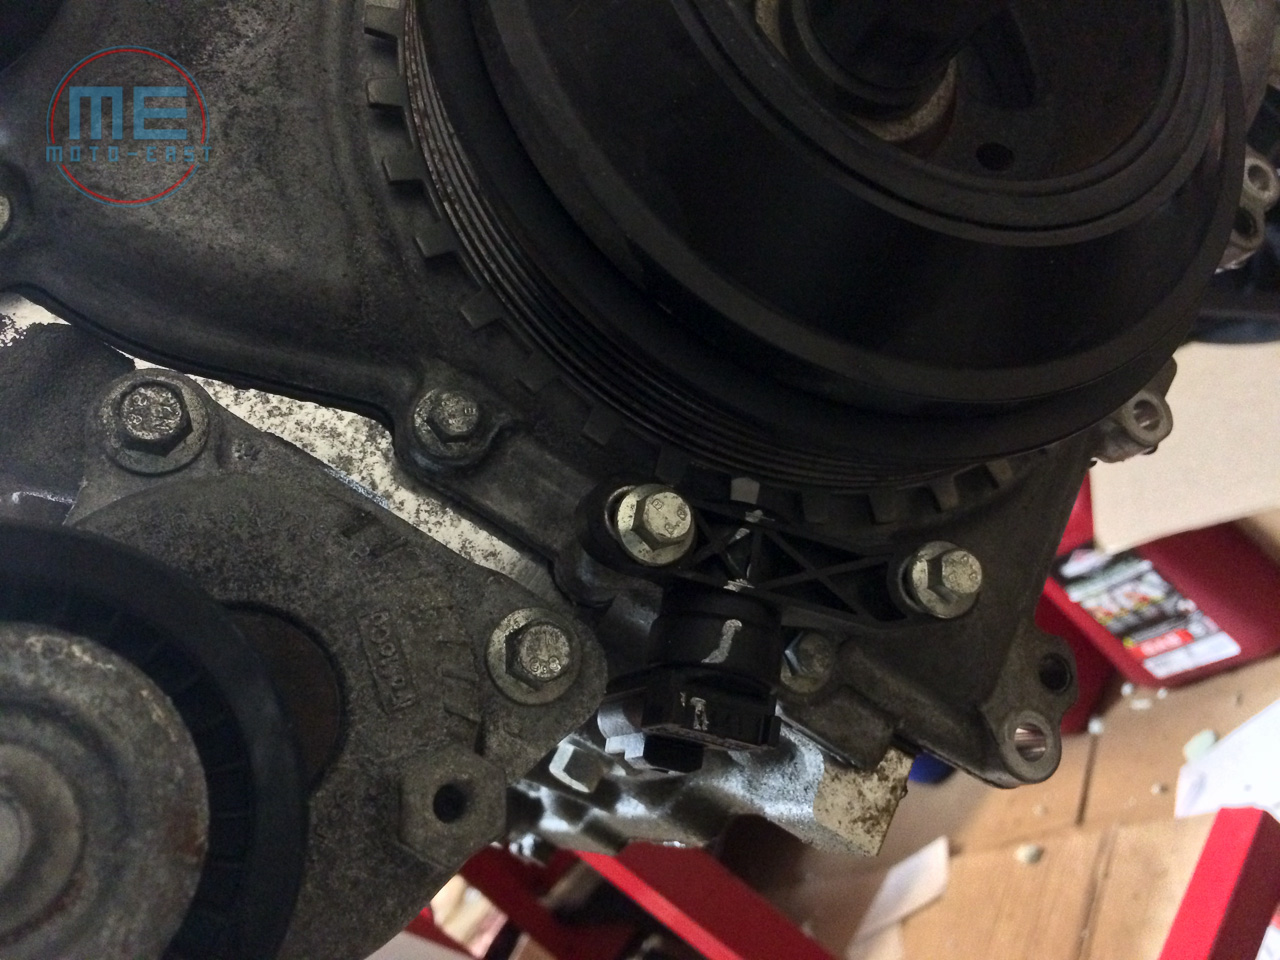
- Crank pulley. The number of teeth is different on the MX-5 than the ford variants. You will want to re-use your crank pulley. However, make sure to replace the washers and use a new crank bolt. Torque to 90 ft lbs, then turn another 90 degrees. You will want a serious breaker bar for this.
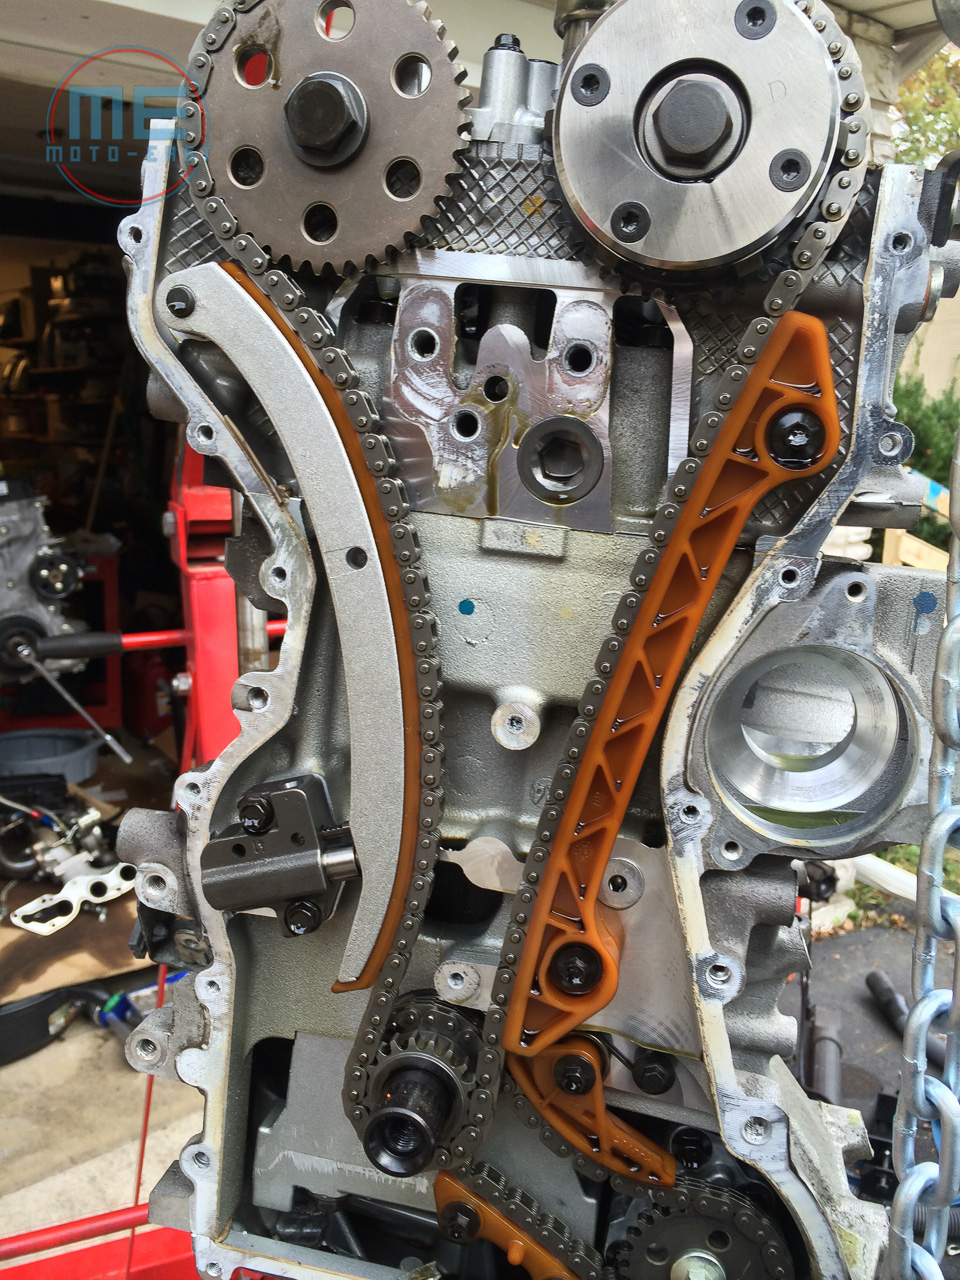
- For setting the timing (prior to the crank pulley swap) you'll need to find TDC for #1. Use either a dial indicator on the cylinder with the plug out (aka the bluemeany method) or use the SST set available from massive, OTC, and others. Eye ball the cams, note the crank angle sensor, and use the bolt on the side of the block that just up against the crank shaft. Tighten the crank pulley bolt to 25 ft lbs. REMOVE the ssts including the bolt on the side of the crank. IT WILL break if you do not. Then proceed with tightening as above.
- Coil packs are different. Spark plugs are different. Wire harness "condenser" is different. Re-use the 2.0 stuff and ditch the 2.5 stuff.
- PCV valve barb size is different. Re-use 2.0 if not using a catch can. Also re-use the 2.0 thermostat housing. The coolant temp sensor housing (on the back of the head) is also different. Re-use your 2.0 stuff.
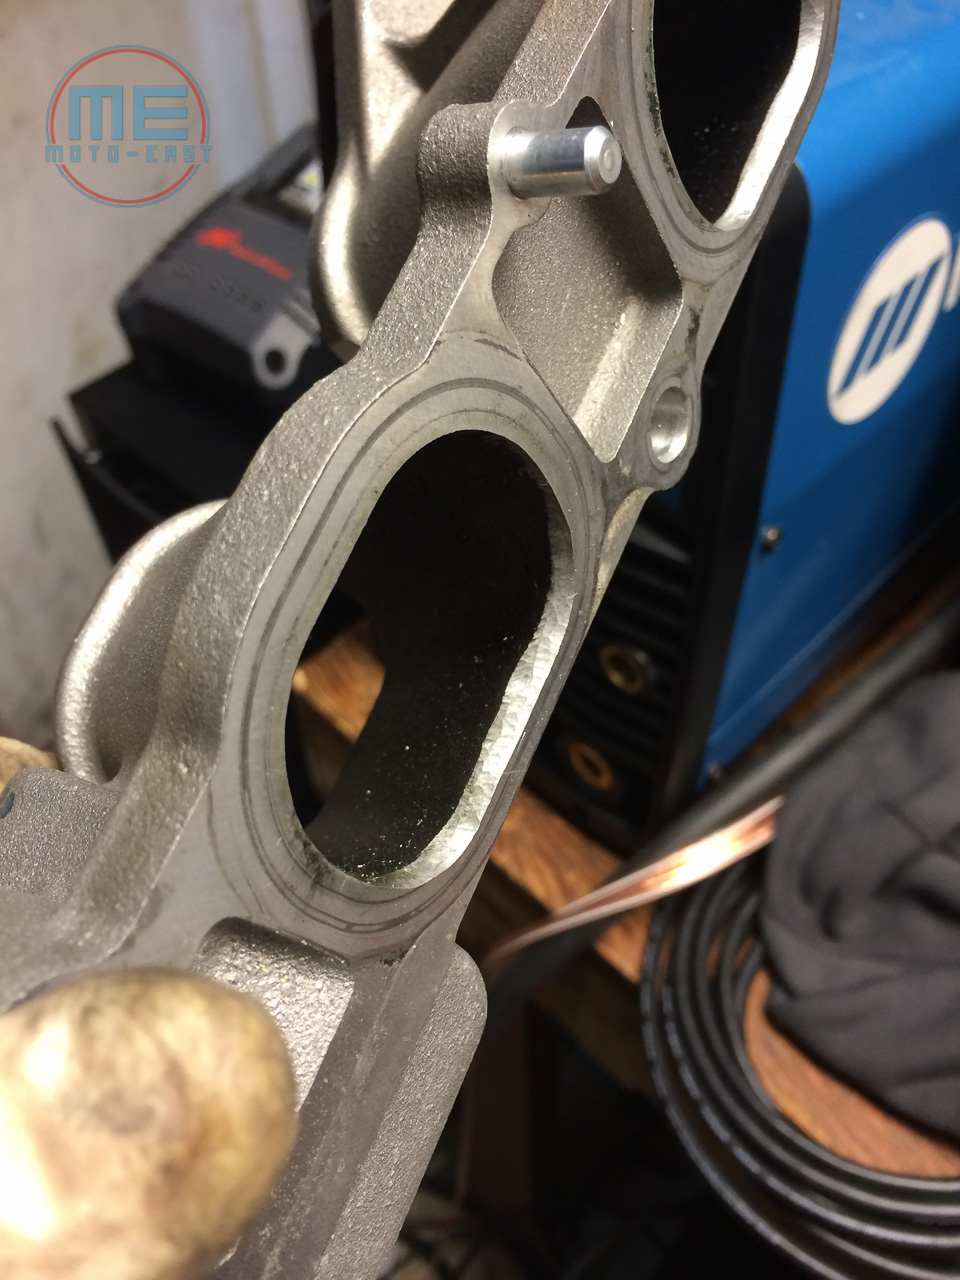
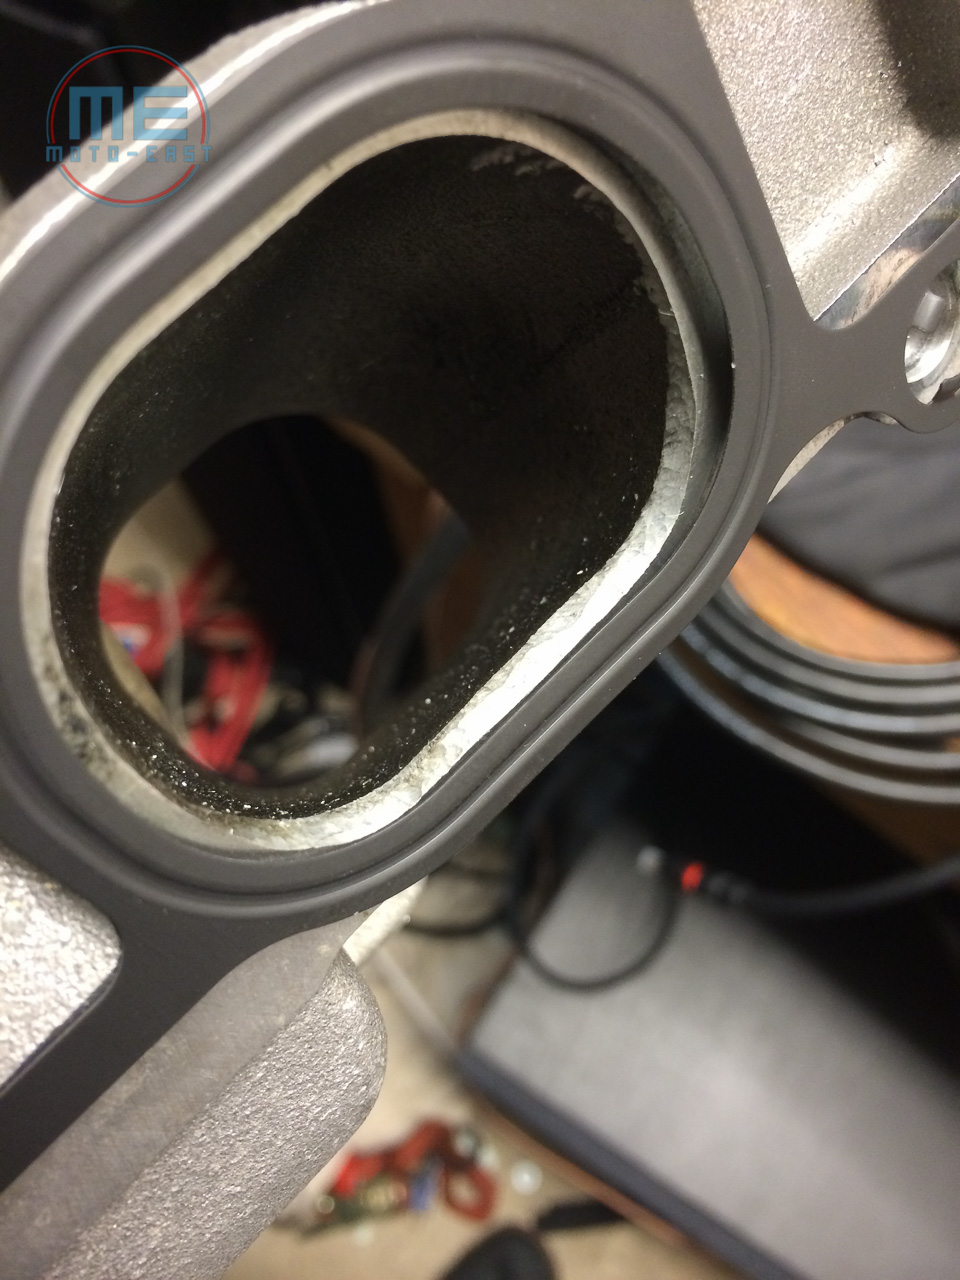
- Now the big one...the heads themselves are different. You have two options. Use the 2.0 head, or use the 2.5 head. The 2.5 head has significantly bigger ports and flows better on the inlet side. However your lower intake manifold is not mated to it. You can't re-use the 2.5 one as it is for FWD, so you can use a die grinder with an aluminum specific bit (do not even try the steel ones...) or even use a hand file and some elbow grease. That will get you to within 1mm of the port size. Note that the gasket from the 2.0 is slightly bigger than the manifold, but slightly smaller than the ports. If you use it you will also be within about 1mm of the ports. You can't use a 2.5 gasket since...it doesn't have one. It uses orings grooved on the inlet manifold.
- Now if you want to really put the time into it you can weld on to your existing RWD lower intake manifold and then surface it and use some RTV to seal. A valid option but a lot of work.
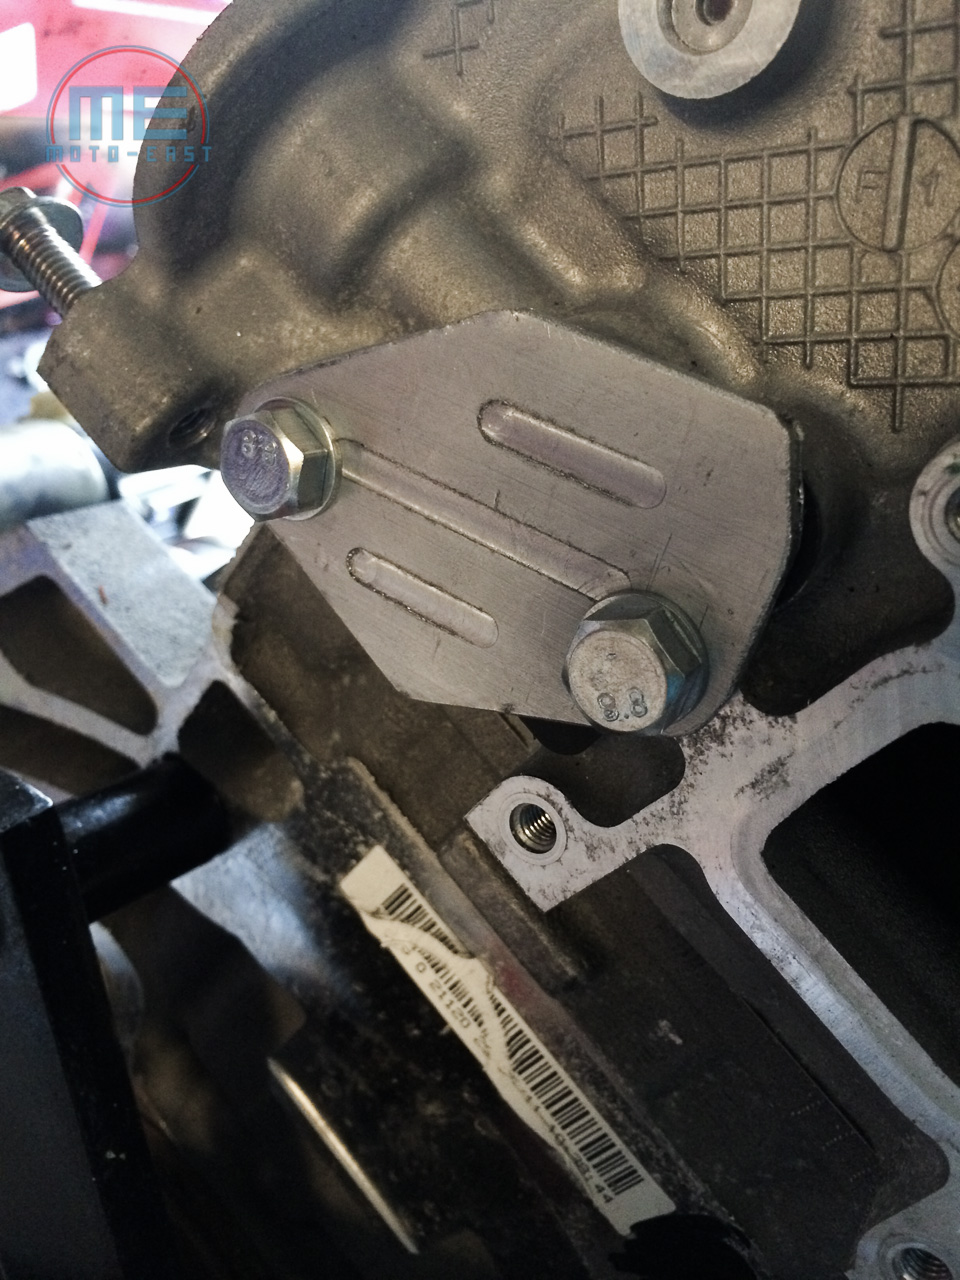
So with all of the steps above you'll find that the motor bolts up perfectly fine. The only issue you'll run into is the PCV barb on the valve cover is further back on the 2.5, and interferes with the water pipe. You should be able to use the 2.0 valve cover but I'm running a catch can so not an issue. It is also a great time to install a EGR blockoff plate and ditch the stock valve. We have these in the online store now, but they eliminate the valve entirely from the back (off road use only). You can then put the regular EGR delete kit on the manifold and plug the head to prevent any leaks and make for easier inlet manifold installation.
A few tips on motor swaps in general if going from the top:
- Pull the cowl and strut tower mounts if equipped. Should only take 10 minutes and makes pulling the motor painless.
- Remove as many accessories as possible
- Remove the wiring harness from the fuse box and battery and leave all sensor connected.
- Remove anything bolted to the valve cover, be careful with the thermostat in the back as you pull, remove the big water pipe.
- Unbolt the ac compressor from the block, move the AC line above the motor, but there is no need to depressurize the AC system.
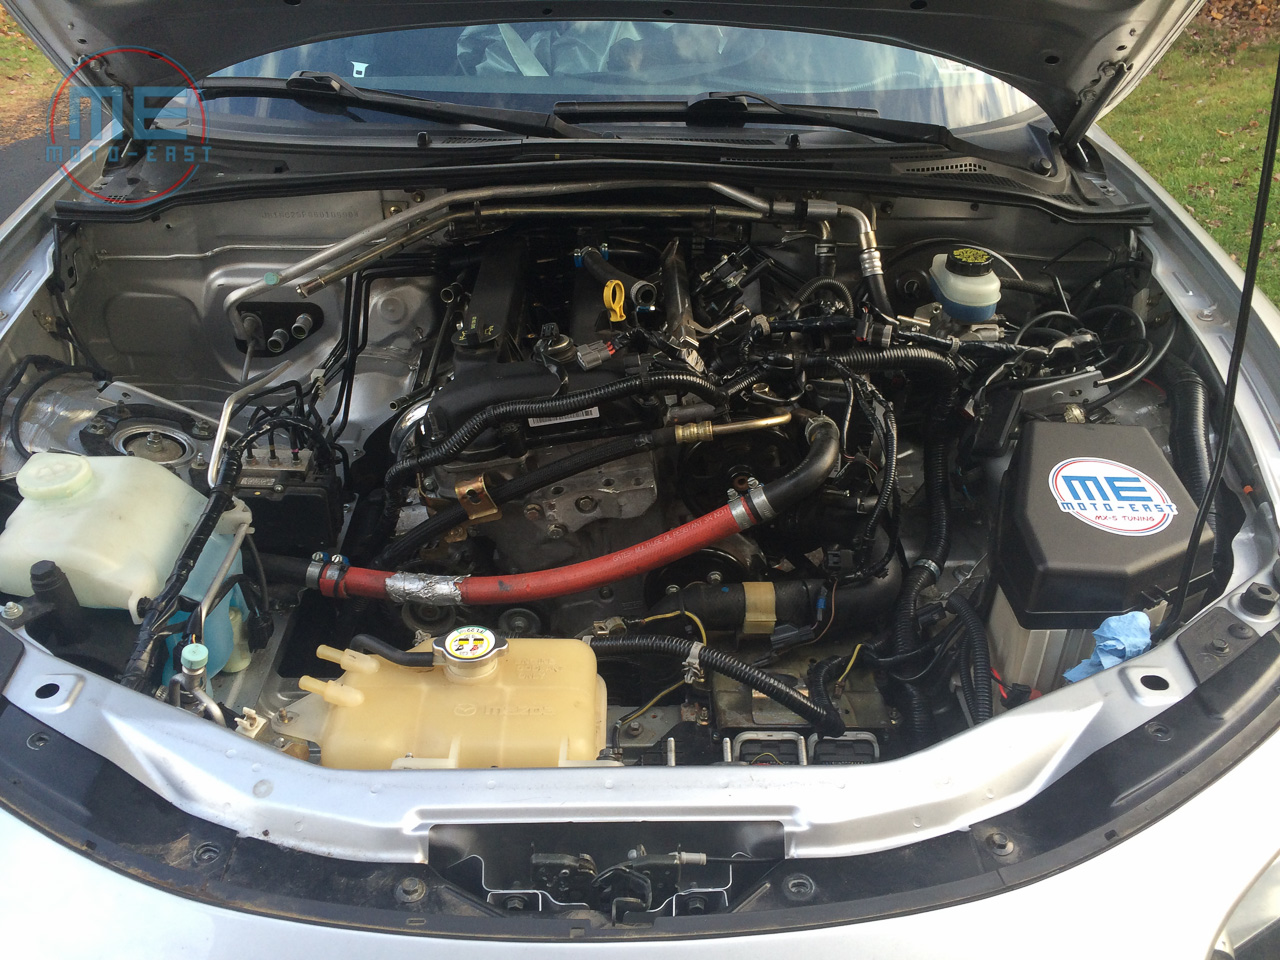
So that should hopefully cover most if not all of it! Some pics are below...
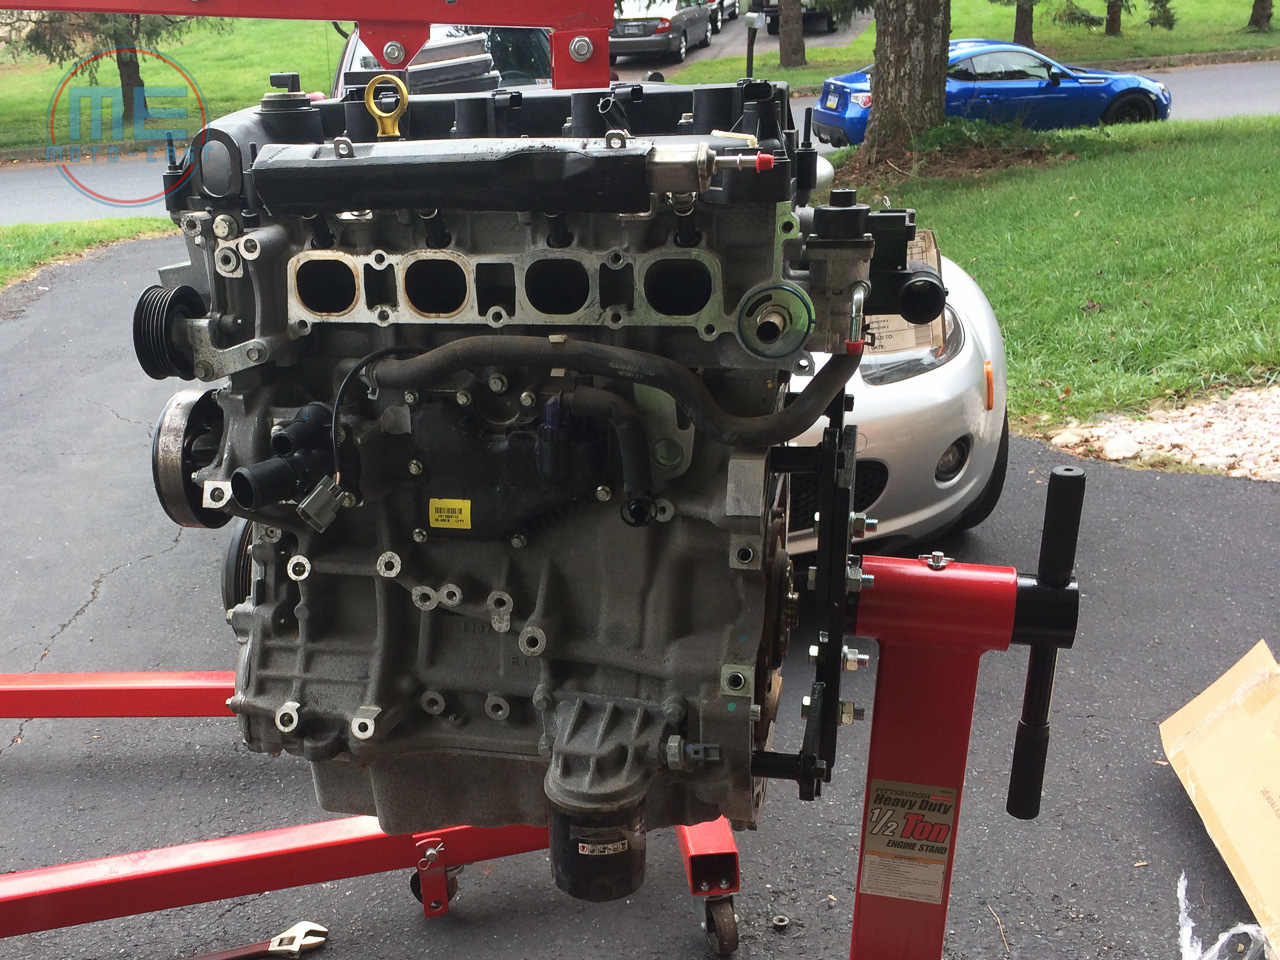
Motor ready for teardown
Balance shafts
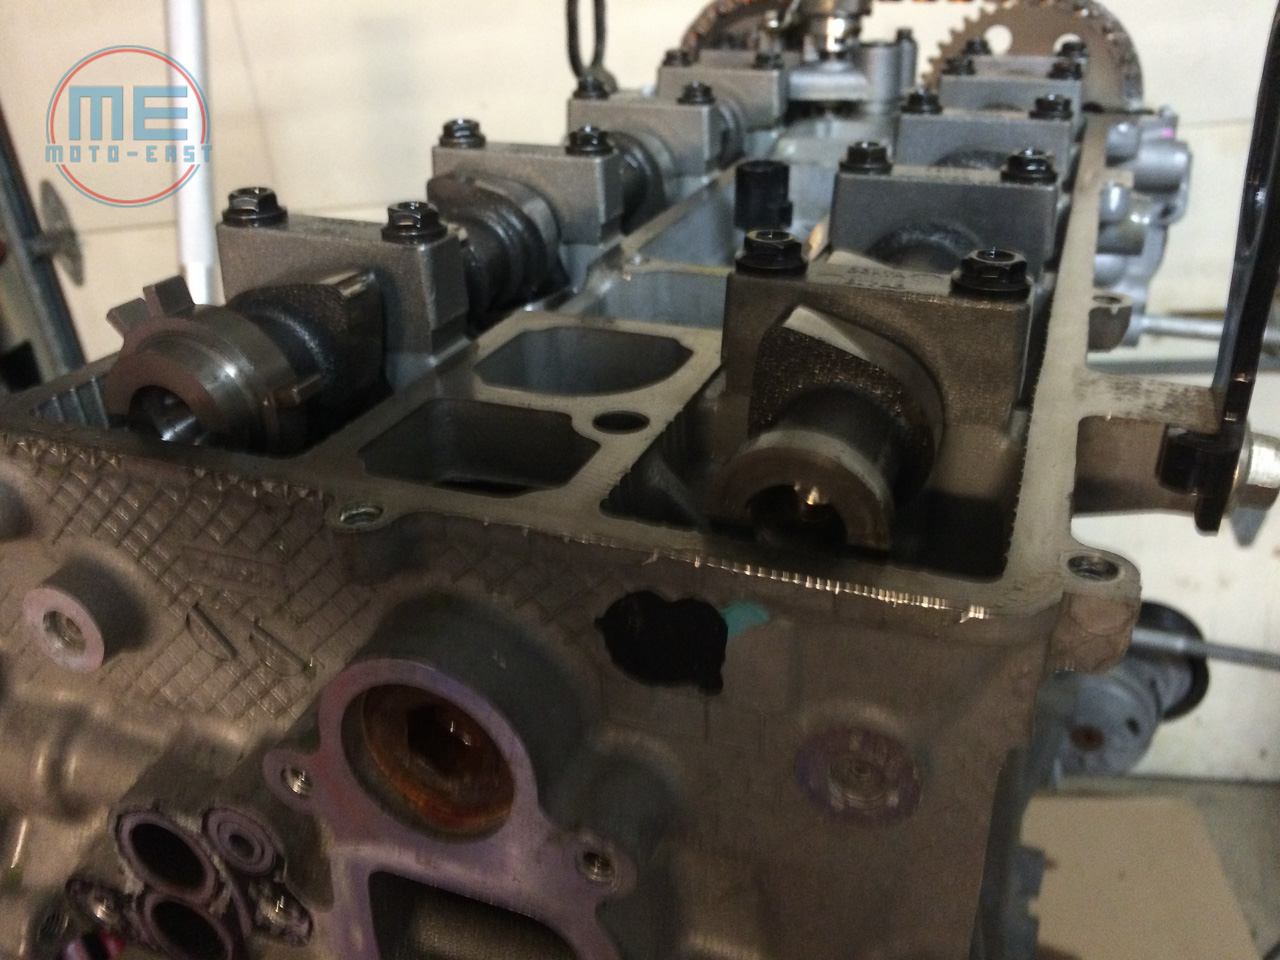
Note the cams--no room to get the SST in. Use a DIY flat piece of barstock and it'll do the trick
Crank pulley alignment marked
What is under the front cover. Note the tensioner. When you do the cams, you insert a bolt into the front cover to lock it in place so that the chain can come off.
The lower inlet manifold with some mild port matching. Note the marks where the gasket was.
And here it is with the gasket applied. you only have to remove material from the upper portion of the port. This leaves a 1mm step on that upper portion. But still enough room to seal and you can use the manifold. I doubt there are really any substantial gains here by welding, since you'd only be altering the opening and the runner size would still be too small. We left it ported but not perfectly matched. Should still outflow the 2.0l
The motor sitting in the bay, but not quite finished.
The hastily made in a manual mill EGR blockoff:
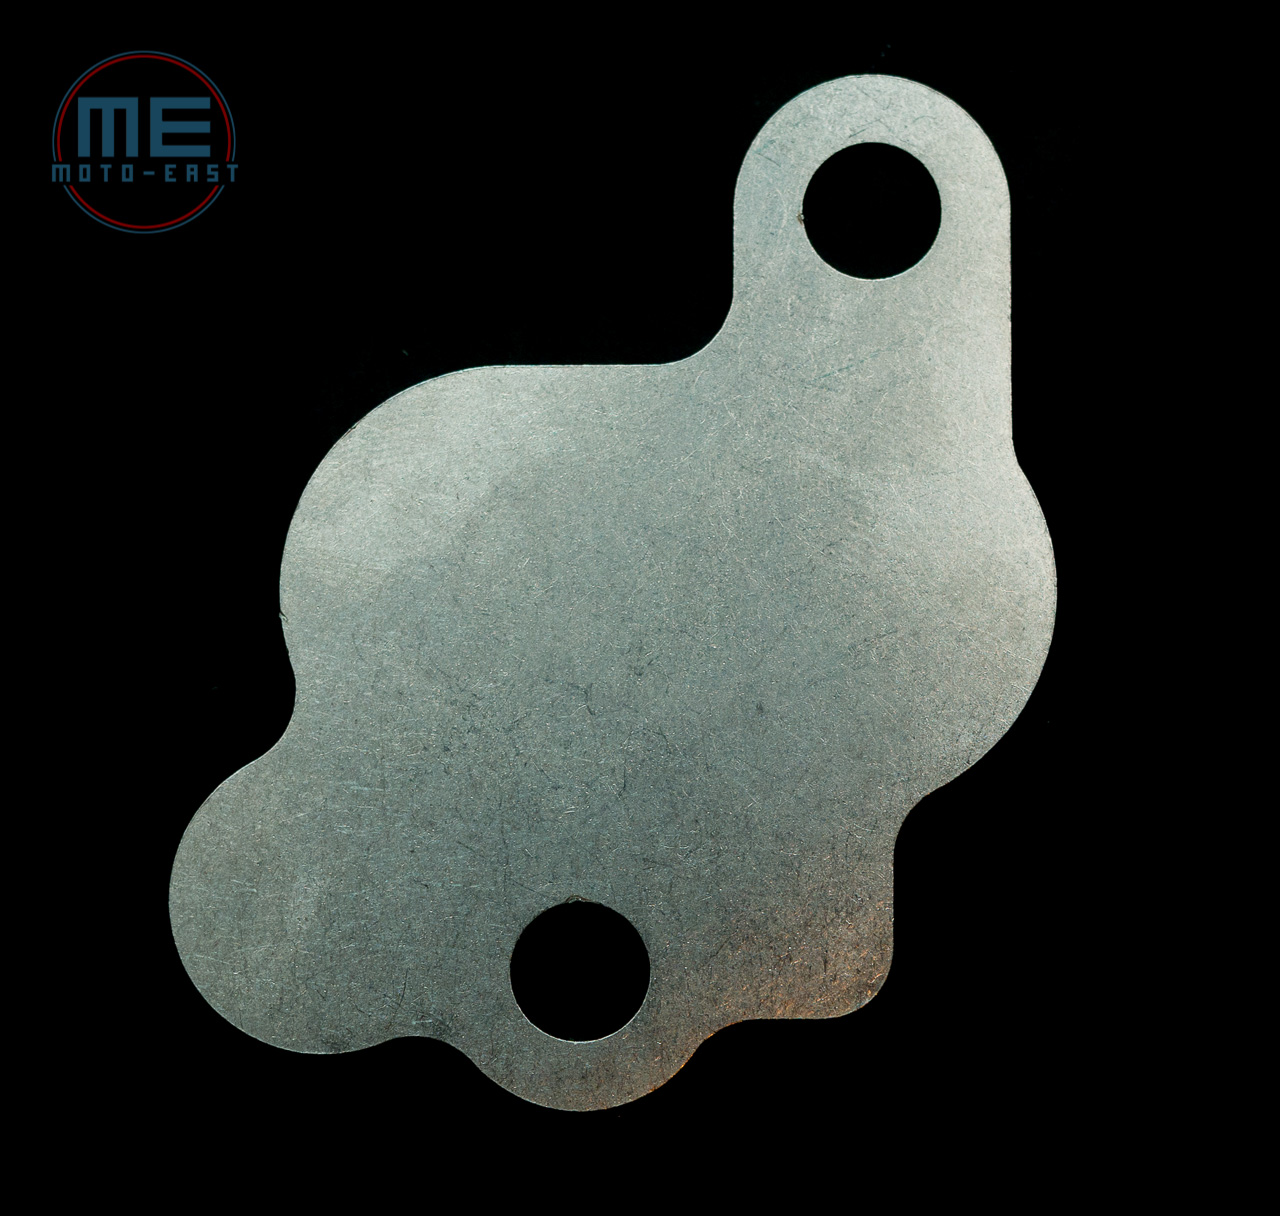
The final laser cut stainless version!:
__________________
Moto-East - Tuning|Parts|Installation
06 MX-5 Turbo - 350 WHP|13 BRZ SC - 285 WHP
EcuTek Master Tuner | YouTube | Facebook
Comments